3D Model Editing in Aholo Editor: Crop, Measure & Annotate 3DGS
A practical walkthrough of the three core editing tools that turn a raw 3D Gaussian Splatting reconstruction into a clean, measured, and interactive 3D model.
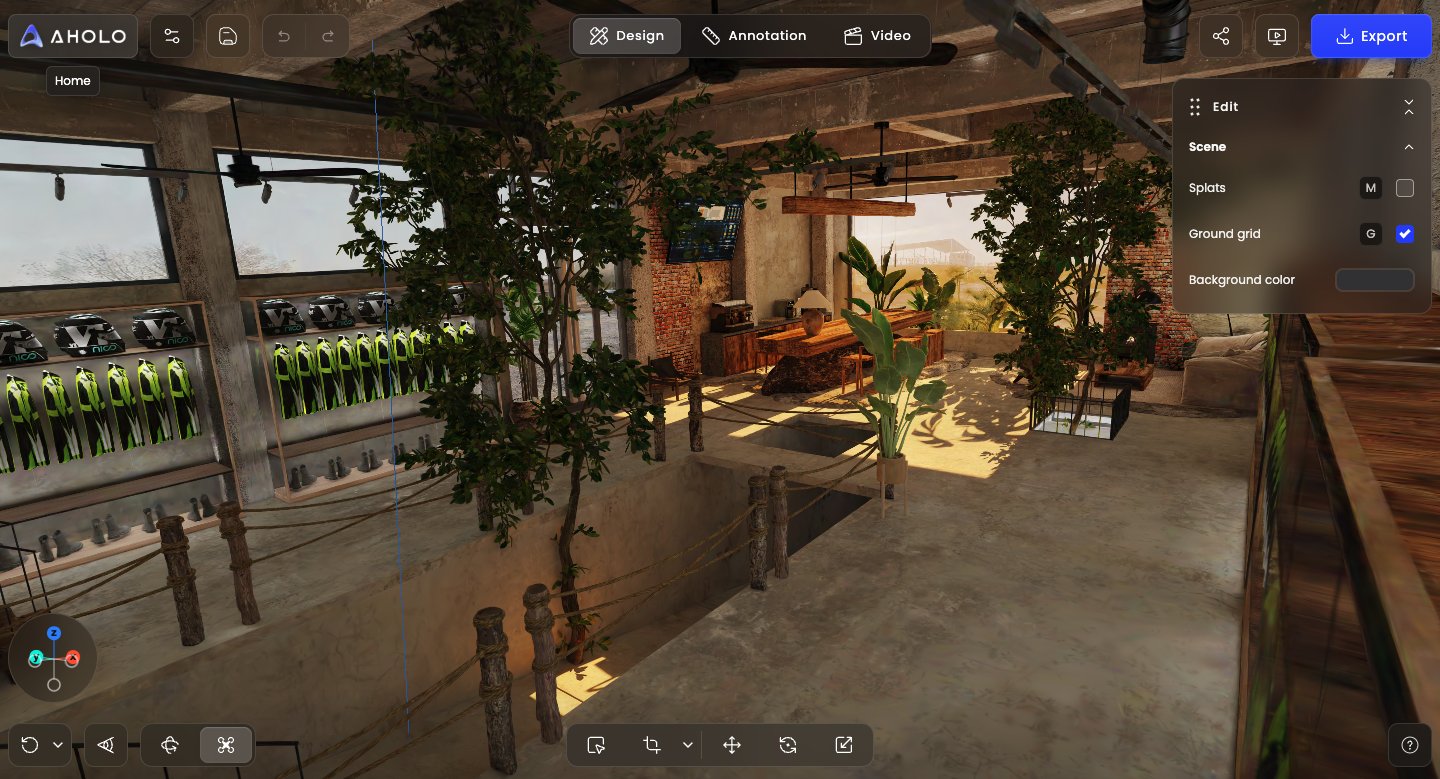
Once Aholo reconstructs your photos or video into a 3D Gaussian Splatting (3DGS) model, the raw output is rarely presentation-ready on its own. Edge noise, off-topic geometry, and an uncalibrated scale all get in the way of real use. The Aholo Editor bundles three main tools — Crop, Measure, and Hotspot — that take a scan from "reconstructed" to "ready to share." This tutorial covers them all.
Why edit your 3DGS model after reconstruction
A 3DGS reconstruction faithfully reproduces whatever the camera captured — including the parts you didn't want. Editing is what makes a scan usable in practice:
- Clean up noise: remove floating artifacts, background clutter, and edge reconstruction errors.
- Get real dimensions: calibrate scale so the model reflects true metric size, not arbitrary units.
- Make it self-explanatory: attach text, images, and links directly to points on the model.
For a refresher on how the 3DGS model itself is produced, see Aholo's 3D Gaussian Splatting reconstruction platform.
1. Crop — clean up and focus your model
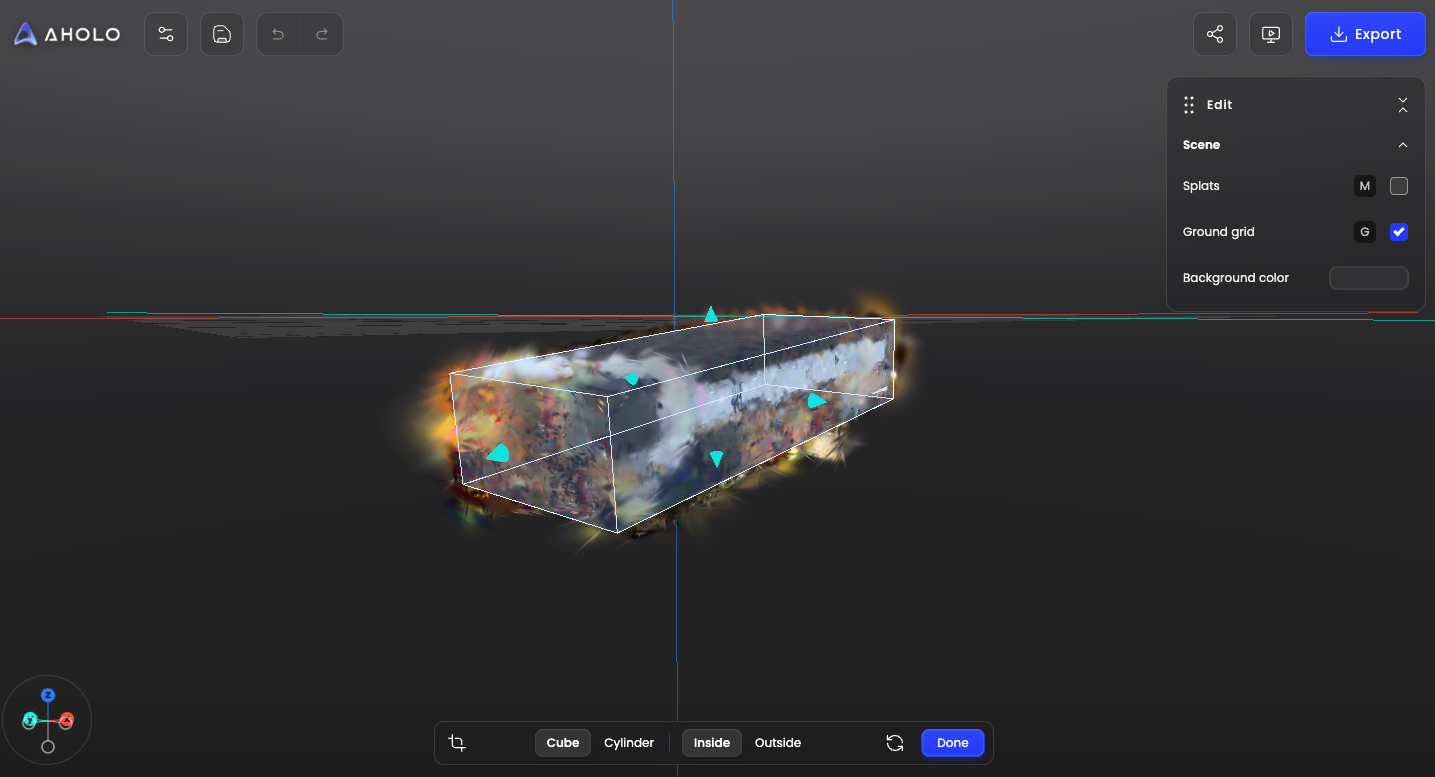
In the Aholo Editor, the Crop tool removes unwanted areas or noise, keeping only the essential parts of your model for a cleaner, more focused result.
1.1 Enter Crop Mode
- Open your project.
- Click Crop to enter crop mode.
1.2 Choose a Crop Shape
Before adjusting, select the shape of the cropping area.
| Shape | Best for | Why |
|---|---|---|
| Cube | Spatial scenes, architecture, interiors | Easier to align with structured, axis-aligned geometry. |
| Cylinder | Single objects, sculptures, products | Wraps around the subject more naturally. |
1.3 Adjust the Crop Area
The crop area can be adjusted by moving, resizing, or rotating the crop box.
Move the Crop Area
- Drag an axis to move the crop box along that direction. The size stays the same; only position changes.
- You can also click an axis and enter an exact distance for precise positioning.
Resize the Crop Area
- Drag the handles on the crop box to adjust length in a specific direction.
- Click a handle and enter a scale value — e.g. entering 2 doubles the length in that direction.
- During adjustment, the system displays updated values (percentage and actual size) for fine control.
Rotate the Crop Area
- Drag the rotation control to adjust the angle of the crop box.
- Useful when the model or target area is not aligned with the default axes.
1.4 Choose a Cropping Mode
After adjusting position, size, and angle, choose how the crop should be applied.
| Mode | Keeps | Removes | Best for |
|---|---|---|---|
| Crop Outside | Area inside the crop box | Everything outside | Removing background, cleaning edge noise |
| Crop Inside | Area outside the crop box | Everything inside | Removing local interference, eliminating unwanted center elements |
1.5 Save & Undo
- Click × to exit crop editing.
- Click ✔ to apply the crop.
Before saving, you can click Undo to revert the previous step. Once saved, the crop cannot be undone — make sure everything looks correct before applying.
1.6 Crop Best Practices
- For complex models, use smaller, multiple crops for better precision.
- Leave some margin around the subject to avoid over-cropping.
- Check the model from different angles before applying the crop.
- Use Cube for structured spaces and Cylinder for single objects.
2. Measure — get real-world dimensions
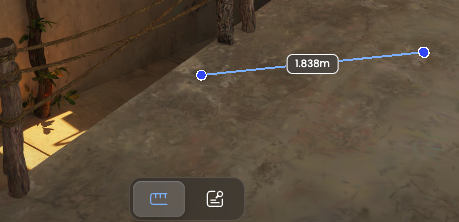
The Measurement tool obtains real-world dimensions within your model. With Auto-correct, you can also adjust the overall scale so results stay accurate.
2.1 Measurement Types
| Type | What it does |
|---|---|
| Ruler | Auto-measures the distance between two points. |
| Path | Continuous measurement of distances across multiple segments. |
2.2 How to Measure Distance
- Click Ruler to enable the measurement tool.
- Click the first point on the model.
- Click the second point.
- The system automatically calculates and displays the distance between the two points.
2.3 One-Click Scale Calibration (Auto-correct)
If the measured result does not match the real-world size, calibrate the model scale by entering a reference value.
- Select reference points — choose two points with a known real-world distance (e.g. between two walls, edges of an object).
- Enter the real measurement — click Auto-correct, then enter the actual distance between the two points as the target value.
- Apply calibration — the system automatically rescales the entire model. Click Save to store the calibrated scale.
Result: all measurements update accordingly, and the model scale aligns with real-world dimensions.
2.4 Accuracy Tips
Choose Proper Reference Points
- Select two points that are relatively far apart.
- Prefer points with accurately measurable real-world distances.
- Ensure the points are clearly visible in the model.
Avoid Common Errors
- Do not select blurry or incomplete areas.
- Avoid regions with poor reconstruction quality.
- Use clear edges, corners, or object boundaries whenever possible.
3. Hotspot Annotation — add interactive information
The Hotspot feature lets you add text, links, images, or videos to your 3DGS model — making it more informative, interactive, and easy to understand.
Use hotspots to:
- Highlight key information and emphasize important details.
- Present projects or provide feedback.
- Annotate spatial layouts, product features, or design intent.
3.1 Add a Hotspot
- Click the Hotspot button in the top toolbar.
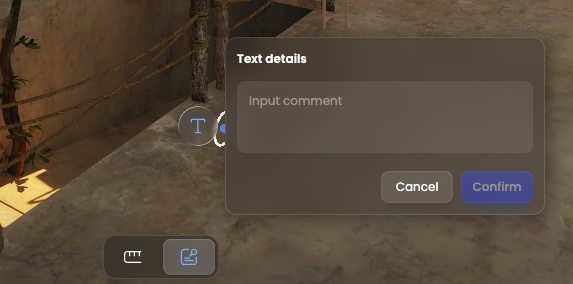
- Choose the type of content you want to add: Text, Link, Image, or Video.
- Click anywhere on the model to place the hotspot and open the editor panel.
- Enter your content in the popup panel.
- Click Confirm.
3.2 Hotspot Content Types
| Type | What to add | Typical use |
|---|---|---|
| Text | Descriptions, notes, comments | Annotations or feedback |
| Link | A URL | Product pages, reference materials, project documentation |
| Image | Multiple uploaded images | Reference photos, close-ups, design precedents |
| Video | Uploaded video or video link | Embedded codes from YouTube, Bilibili, and other platforms |
3.3 View & Edit Hotspots
- Click a hotspot in the model to open its content panel.
- Edit content directly in the panel, or click Delete to remove the hotspot.
- Click Confirm to save changes.
3.4 Hotspot Use Cases
- Project presentation: annotate spatial layouts and explain design intent.
- Product showcase: highlight key features or details with supporting images or videos.
- Collaboration & feedback: team members comment directly on the model; record issues or suggestions.
- Teaching & demonstration: explain model structure step by step and guide the viewing sequence.
A Suggested Editing Workflow
For the cleanest result, work through the three tools in this order:
- Crop first. Remove background and noise before anything else — there is no point measuring or annotating geometry you are about to delete.
- Calibrate scale. Pick two well-separated, clearly visible reference points and run Auto-correct so every later measurement is trustworthy.
- Measure. Add any Ruler or Path measurements that need to live in the shared scene.
- Annotate. Add Hotspots for point-specific information (text, links, images, videos).
Tip: crop in small, targeted passes rather than one big cut, and rotate the model to check from several angles before clicking ✔. Saved crops cannot be undone.
Once editing is done, you can export the result as PLY or SPZ, or share it via a link.
FAQ
Can I undo a crop after saving it? No. Once you apply a crop by clicking the checkmark, it cannot be undone. Before saving, you can click Undo to revert the previous step, so make sure everything looks correct before applying.
What is the difference between Crop Outside and Crop Inside? Crop Outside keeps the area inside the crop box and removes everything outside it — best for removing background and edge noise. Crop Inside keeps the area outside the box and removes everything inside it — best for removing local interference or unwanted center elements.
How does Auto-correct scale calibration work? Select two points with a known real-world distance, click Auto-correct, enter the actual distance as the target value, and Save. The system rescales the entire model so all subsequent measurements match real-world dimensions.
What content can I add to a hotspot? Text (descriptions, notes, comments), Links (URLs to product pages or docs), Images (multiple uploads supported), and Videos (uploaded files or embedded codes from platforms like YouTube and Bilibili).
Which 3D format do these editing features work on? These features work on 3D Gaussian Splatting (3DGS) models reconstructed by Aholo. You can export edited results as PLY or SPZ, or share them via a link.