Best 3D Scanner App for Everyday Use: Create 3D Models with Guided Scanning
Discover what 3D scanner apps can do, the differences between photogrammetry, LiDAR, and 3DGS, and why Aholo 3D offers a more complete and realistic 3D scanning workflow.
Quick Answer: The Best 3D Scanner App for Most People
If you're looking for a 3D scanner app that actually works—without export paywalls or confusing interfaces—Aholo 3D is one of the best choices available.
Here's why:
-
Guided shooting: A built-in guide helps you scan objects or spaces correctly. A visualization shows which areas you've covered when scanning an object, while clear instructions guide you through room scanning.
-
Cross-platform workflow: Scan on your phone, then switch to desktop for editing, measuring, cropping, and exporting in PLY or SPZ format. Everything syncs automatically.
-
All-in-one platform: Instead of juggling multiple apps, you get scanning, editing, measurement, annotation, and walkthrough video generation in a single workflow.
-
Free to use: Unlike many apps that lock exports behind subscriptions, Aholo 3D allows you to complete your workflow without hitting a paywall at the final step.
Most 3D scanner apps stop at "capture." Aholo 3D goes further—from guided shooting to editing to export. That's the difference between a toy and a real tool.
What Can You Do with a 3D Scanner App?
Before comparing different apps, it's worth understanding what a 3D scanner app can actually do.
If you've never used one before, you might be surprised at how practical it is—not just for engineers or designers, but for everyday life.
Preserve Travel and Life Memories in 3D
Most people already take photos while traveling.
But a 3D scan captures something photos can't: the feeling of being inside a place.
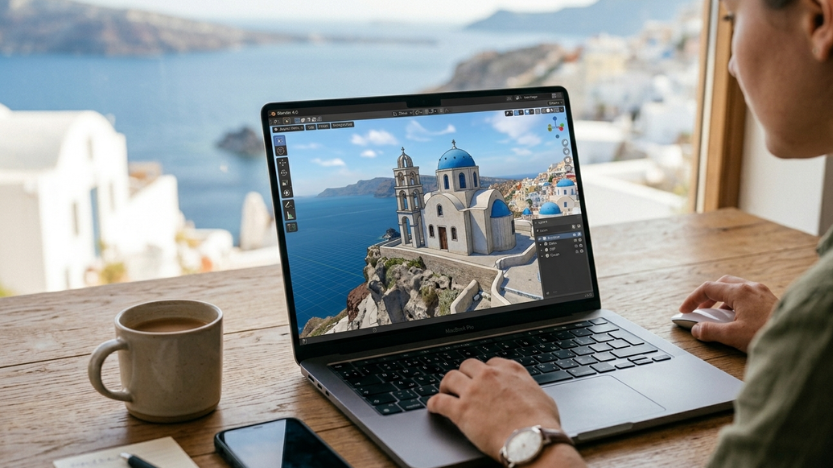
One user shared a story with us about scanning a small chapel in rural Italy. At first, walking around it with a phone felt awkward. But later, when he opened the 3D model on his laptop, he could virtually "walk through" the space again.
The light on the stone walls. The proportions of the nave. The placement of the altar in the corner.
It became more than a photo—it became a memory you could revisit.
And you don't need professional equipment.
A phone and a free app are enough to create something worth keeping.
Document Your Space or Architecture
If you're renovating a room, redesigning a space, or simply trying to remember how a place looked before changes, 3D scanning is extremely useful.
Some homeowners scan apartments before moving out so they can reference layouts and measurements later when planning a new home.
Architects use scans to capture existing conditions before renovations. Real estate agents create walkthroughs that feel far more immersive than static photo galleries.
The goal isn't perfect precision.
It's documentation you can actually use.

Create 3D Assets for Creative Projects
Game developers, filmmakers, and digital artists frequently use 3D scans as source material.
Instead of modeling everything from scratch, they scan real-world objects and refine them in software like Blender or Unreal Engine.
Even if you're not a professional, you might still want:
- A 3D model of your car
- A digital version of your guitar
- A scan of a sculpture you created
You can drop these assets into game engines or simply share them with friends.
A 3D scanner app makes 3D creation accessible without requiring CAD experience.
Digitize Objects for Online Showcase
More online stores are beginning to use 3D models instead of static product photos.
Customers can rotate, zoom, and inspect products from every angle, creating more trust and reducing returns.
If you sell handmade products, antiques, or anything where realism matters, 3D scanning gives you a significant advantage.
You don't need a professional studio.
A phone and the right app can already produce impressive results.
How 3D Scanner Apps Work: A Quick Overview
Not all 3D scanner apps use the same technology.
Understanding the differences helps you choose the right workflow and set realistic expectations for results.
Photogrammetry vs LiDAR vs 3DGS
Here's the simplified comparison:
| Technology | How It Works | Best For | Limitations |
|---|---|---|---|
| Photogrammetry | Reconstructs 3D models from overlapping photos by estimating geometry and camera poses | Objects, detailed surfaces, artifacts | Requires many images and good coverage; struggles with reflective or transparent materials |
| LiDAR | Uses laser depth sensing to generate point clouds | Large spaces, rooms, architecture | Requires LiDAR-supported hardware; limited detail for small objects |
| 3D Gaussian Splatting (3DGS) | Represents scenes using optimized Gaussian primitives learned from multi-view images | Real-time photorealistic rendering | Newer workflow; less standardized; not ideal for precise geometry editing |
Most apps today rely on photogrammetry or LiDAR.
Apps like Polycam and Aholo 3D now support 3DGS as well.
Why 3DGS Produces More Realistic Results
Traditional photogrammetry usually generates a mesh—a surface built from thousands of triangles.
It works, but the results often appear soft or flattened when viewed up close. Fine details can easily disappear.
3DGS works differently.
Instead of creating a mesh, it generates thousands of tiny Gaussian splats.
Each splat stores:
- Color
- Transparency
- Positional data
When rendered together, they create visuals that look remarkably close to real photographs.
The trade-off is compatibility.
3DGS formats are not yet as universal as OBJ or STL.
But if your priority is realism—such as immersive walkthroughs or realistic product showcases—3DGS can deliver better results with less manual work.
Aholo 3D uses 3DGS as its core technology, which is why its scans often feel more lifelike than traditional photogrammetry outputs.
Why Aholo 3D Stands Out
Aholo 3D stands out for a few practical reasons—not marketing buzzwords, but workflow improvements that genuinely matter.
Smart Shooting Guide for Objects and Spaces
When people choose a 3D scanner app, they often overlook shooting guidance.
But the hardest part of 3D scanning isn't the reconstruction algorithm.
It's knowing how to move correctly to capture complete coverage.
Aholo 3D solves this with built-in guidance:
-
Object Mode: A sphere appears on screen. As you move around the object, covered areas light up. Miss an angle? That section stays dark until you capture it.
-
Space Mode: Instead of circling an object, you move through a room. The app visually guides your scanning path to ensure complete room coverage.
This is useful not only for beginners.
Even experienced users benefit from reduced guesswork and fewer failed scans.
You always know whether you've covered enough.
Cross-Platform Workflow: Scan on Phone, Edit on Desktop
Phones are excellent for capturing.
They're not ideal for detailed editing.
Pinching to zoom, measuring with your fingers, and inspecting fine details on a small screen quickly becomes frustrating.
Aholo 3D separates the workflow:
- Capture on your phone
- Edit on your desktop
Synchronization happens automatically.
Open Aholo 3D in your browser, and your scan is already there.
You can then:
- Crop point clouds
- Measure distances
- Add annotations
- Generate walkthrough videos
This isn't just convenient.
It's a more natural workflow: capture in the field, refine at your desk.

Complete Editing Tools in One Place
Most 3D scanner apps stop after reconstruction.
If you want to crop, measure, or annotate your model, you'll usually need separate software.
Aholo 3D includes built-in editing tools:
- Crop: Remove unwanted background geometry and clutter
- Measure: Extract real-world dimensions from scans
- Annotate: Add notes or markers to specific locations
- Walkthrough Video: Automatically generate smooth flythrough animations
Everything happens inside a single workflow.
Free to Use — No Export Paywalls
A common frustration with many apps:
You spend 30 minutes scanning something beautifully.
Then you click "Export."
And suddenly:
"Upgrade to Pro to download your model."
That's not truly free.
That's a demo.
Aholo 3D allows most users to scan, edit, and export without immediately hitting a subscription wall.
For everyday usage, the free tier is often enough to complete entire projects.
How to Create a 3D Model with Aholo 3D
Ready to try it yourself?
Here's the full workflow—from opening the app to exporting your finished model.
Step 1: Choose Object or Space Mode
When launching Aholo 3D, you'll see two options:
- Object: For scanning individual items like furniture, sculptures, or products
- Space: For rooms, hallways, and environments you move through
Choose the mode that matches your subject.
The app adjusts guidance automatically.
Step 2: Follow the Shooting Guide
Once scanning begins, follow the visual instructions.
- Object mode: Slowly walk around the object while keeping it in frame
- Space mode: Move along the room perimeter while capturing upper, middle, and lower perspectives
Don't rush.
Steady movement produces better scans.
Step 3: Wait for Automatic Reconstruction
After capturing, submit the scan for processing.
Aholo 3D automatically reconstructs the scene using 3DGS technology.
This usually takes several minutes depending on scan complexity.
No manual settings are required.
You can even close the app while processing happens.
Once finished, the model appears in your library.
Step 4: Switch to Desktop for Editing
Open Aholo 3D in your desktop browser.
Your scan syncs automatically.
Now you can:
- Crop the model
- Measure distances
- Add annotations
- Generate walkthrough videos
Editing on a larger screen is significantly easier.
Step 5: Export or Share Your Model
When your model is ready, you have two options:
- Export: Download in PLY or SPZ format for use in Blender and other software
- Share: Copy a browser link so anyone can view the model online without installing anything
You can also export walkthrough videos for social media sharing.
From start to finish, the entire workflow usually takes around 15–20 minutes.
Tips for Better 3D Scan Results
The shooting guide helps a lot.
But scan quality still depends heavily on how you shoot.
Here are a few practical tips.
Lighting Matters More Than You Think
3D scanning relies on visible detail.
Poor lighting introduces noise and reconstruction errors.
For best results:
- Use natural daylight whenever possible
- Soft indirect sunlight works best
- Turn on all indoor lights
- Avoid harsh shadows
- Avoid scanning at night using only a phone flashlight
Keep Movement Steady
The most common scanning mistake is moving too quickly.
Instead:
- Walk at a natural pace
- Keep the camera aimed consistently
- Avoid sudden movements
- Maintain stable distance from your target
Avoid Reflective and Transparent Surfaces
Glass, mirrors, shiny metals, and transparent plastics are difficult for 3D scanning systems.
These materials lack stable visual texture.
Possible solutions:
- Cover reflective areas with matte material
- Avoid direct mirror angles
- Skip transparent objects when possible
Clean Up the Scene Before Scanning
Background clutter creates unnecessary cleanup work later.
If you scan a statue on a messy desk, the cables, cups, and surrounding clutter will all become part of the model.
Try to:
- Use clean backgrounds
- Remove unnecessary objects
- Prefer simple surfaces and walls
Check Coverage Before Submitting
Before processing your scan, quickly confirm:
- Did you capture the top and bottom?
- Did you scan all sides?
- Are there obvious gaps?
It's much faster to add extra coverage now than redo the entire scan later.
FAQ
Can I Use My Phone as a 3D Scanner?
Yes.
Most modern smartphones can perform 3D scanning through:
- Photogrammetry using the standard camera
- LiDAR scanning if supported by the device
You don't need expensive hardware.
Apps like Aholo 3D or Scaniverse are enough to get started.
While the results won't match professional industrial scanners, they're more than good enough for everyday creative and documentation purposes.
What's the Difference Between Photogrammetry and 3DGS?
Photogrammetry creates a mesh using multiple photos.
It's strong for geometric reconstruction but can appear soft or incomplete visually.
3DGS represents scenes using optimized Gaussian primitives containing color, transparency, and shape information.
The result is typically more photorealistic.
In simple terms:
- Photogrammetry prioritizes geometry
- 3DGS prioritizes visual realism
Aholo 3D is built around 3DGS technology.
Can I Edit and Export Across Different Devices?
Yes—if the app supports synchronization.
Aholo 3D allows you to:
- Scan on your phone
- Edit and export on desktop
This provides a much smoother workflow for detailed editing.
Start Creating Your First 3D Model Today
Now you've seen:
- What 3D scanner apps can do
- How different scanning technologies work
- Why Aholo 3D offers a more complete workflow
The best way to understand it is simply to try it yourself.
Pick something nearby:
- A coffee mug
- A piece of furniture
- A corner of your room
Open Aholo 3D, follow the shooting guide, and create your first scan.
In about 15 minutes, you'll have a fully shareable 3D model.
No prior experience required.
No expensive equipment needed.
Just your phone and a little curiosity.
Ready to start? Try this Aholo 3D app today.